
Rooms, Spaces and Areas: Everything Revit Won't Show You in 3D

Rooms are one of the first things anyone learns in Revit, and one of the last things anyone cleans up. They quietly collect warnings, hide in phases and design options, and disappear the moment you switch to a 3D view. I first built a single add-in to fix the 3D part. It kept growing until it became too complex for one tool, so I split it into three: one for 3D tags, one for 3D volumes, and one just for cleanup. And I still have too many ideas on how to improve them for one lifetime.
This guide covers what rooms, spaces and areas are, where the most common room warnings come from, how to clean them up, and how to finally see your rooms in 3D, both in Revit and in Navisworks.
In this article
- What’s the difference between rooms, spaces and areas in Revit?
- Why can’t I see rooms in 3D views?
- What does “Room is not in a properly enclosed region” mean?
- What is a Redundant Room in Revit?
- How do I delete unplaced rooms in Revit?
- What is a “Not Placed” room in Revit?
- Can a room live across multiple phases?
- How do I clean up rooms, spaces and areas across phases and design options?
- How do I tag rooms in 3D views?
- How do I show rooms as 3D volumes?
- Why would I use 3D areas?
- How can room volumes help with MEP ceiling coordination?
- Do 3D room tags and volumes work with linked models and phases?
- How do I show 3D room tags only in the Navisworks view?
- How do I remove 3D room tags, volumes and their filters?
- FAQ
What’s the difference between rooms, spaces and areas in Revit?
Rooms and spaces behave almost the same way. Areas are a different thing altogether.
Rooms are mostly for architecture. Besides name, number, area and volume, they carry information about floor, wall and ceiling finishes.
Spaces are mostly for mechanical engineers and MEP in general. They work like rooms but come with additional parameters for MEP analysis and design, such as occupancy loads.
In terms of behavior, rooms and spaces are the same: they have an area, their volume can be calculated from their real 3D bounds once volume computation is turned on, but they are only visible in 2D views.
Areas are flat elements inside closed boundaries. They have no 3D volume and only a minimum of parameters. Their strength is flexibility:
- You can create different area types, for example usable area, gross area and so on
- Each area plan view is tied to its own area type
- Area boundary lines don’t have to be precisely drawn polygons. They are allowed to cross each other at corners, which makes them much more forgiving than room boundaries
Why can’t I see rooms in 3D views?
Because Revit only shows rooms and spaces in 2D views. Room and space tags work well in plans, but Revit has no built-in way to display rooms, their names or their boundaries in a 3D view.
On a small project, that’s an inconvenience. On a large one, it means switching back and forth between plans and 3D during every model review. Navisworks can show room geometry in 3D, but those objects mostly get in the way when selecting everything else, so they usually end up switched off, and the spatial context goes with them.
There’s a bigger problem too: checking room quality. A room’s 3D extent depends on its height settings, and there’s no easy way to tell whether each room actually reaches the ceiling or the roof above it. Natively, you’d have to go through a pile of sections and check room by room. On a large project, nobody does that, so wrong room heights and volumes go unnoticed.
The fix is to turn rooms into real 3D elements: tags and volumes that live in the model and show up in every 3D view. With room and space volumes in 3D, you can see at a glance whether they reach the ceiling or the roof. More on that below.
What does “Room is not in a properly enclosed region” mean?
It means a room or space is not fully bounded.
You get it in two situations:
- A room or space is placed in an area that isn’t closed. There’s a gap somewhere in the walls, room separation lines or other bounding elements, so Revit can’t define its boundary.
- One or more boundaries of an existing room or space were removed. A wall gets deleted or moved, a separation line disappears, and the room is left open.
The room still exists in the model, but it has no valid boundary and no area. These are the Not Enclosed rooms.
What is a Redundant Room in Revit?
A Redundant Room is a room placed in a space that already has a room in it.
It happens in two ways:
- A second room is placed in a space that already contains one.
- A boundary changes and two rooms flow into one. A wall or separation line between two rooms is deleted or moved, and the two rooms now occupy the same enclosed space.
Only one of them can own that space. The other becomes redundant: it stays in the model, but it doesn’t really describe anything.
How do I delete unplaced rooms in Revit?
Natively, through a schedule. Create a room schedule, find the rows marked Not Placed, select them and delete them from the schedule.
That works fine on a simple model. The problem is that rooms, spaces and areas can live in different phases and design options. Finding all of them, knowing where each one is and deleting them efficiently is extremely hard. You end up with several schedules, phase filters and design option checks just to be sure you didn’t miss anything.
And unplaced rooms are only one of four problem categories. Not Enclosed and Redundant rooms need cleanup too.
What is a “Not Placed” room in Revit?
A room or space can exist in the project without being placed, waiting in a schedule until there’s a space to place it in. Deleting a room from a view doesn’t delete it from the project. It ends up in the schedule with a “Not Placed” status.
That’s actually a good thing, because all the room data is kept: Room Name, Room Number, Department, Floor Finish, Wall Finish and so on (similar for spaces). You can reuse that room later and place it inside new bounds without entering the data again.
The problem is that these rooms are often forgotten. You need to remember them and either delete them or filter your schedules, so these ugly statuses don’t end up in your documentation.
Can a room live across multiple phases?
No. Rooms and spaces exist in a single phase. They only have a Phase parameter, not Phase Created and Phase Demolished like other elements.
This actually makes sense, because across phases you may add or remove walls or other boundaries, and your room layout looks different. But it makes it tough to keep the same room and space names and numbers across phases in areas where nothing changes. If you update a room’s name or number, you need to be careful and update the same room in every other phase too.
How do I clean up rooms, spaces and areas across phases and design options?
Room Space Cleanup is a free tool built for exactly this job. It does one thing: it finds and deletes problem rooms, spaces and areas.
It lists every room, space and area by status:
- Placed
- Not Placed
- Not Enclosed
- Redundant
Phases and design options included, so you can see where each element actually lives. Then you delete a whole category in one click, instead of hunting through schedules phase by phase.
Room Space Cleanup is free, as part of Via BIM Tools.
How do I tag rooms in 3D views?
Revit can’t tag rooms in 3D natively, so you need 3D elements that carry room data.
Room 3D Tags generates 3D tags for rooms, spaces and areas, showing their names and numbers directly in 3D views. The workflow is simple and runs top to bottom:
- Choose the phase and workset where the tags will be placed
- Pick the tag family. A default family loads automatically the first time you run the tool, but you can use your own, as long as it has Name and Number instance text parameters
- Select the rooms, spaces and areas to tag from a table that lists them from the current model and all linked models, organized by phase
- Run
Running the tool again doesn’t duplicate existing tags, so you can safely add tags for new rooms later.
How do I show rooms as 3D volumes?
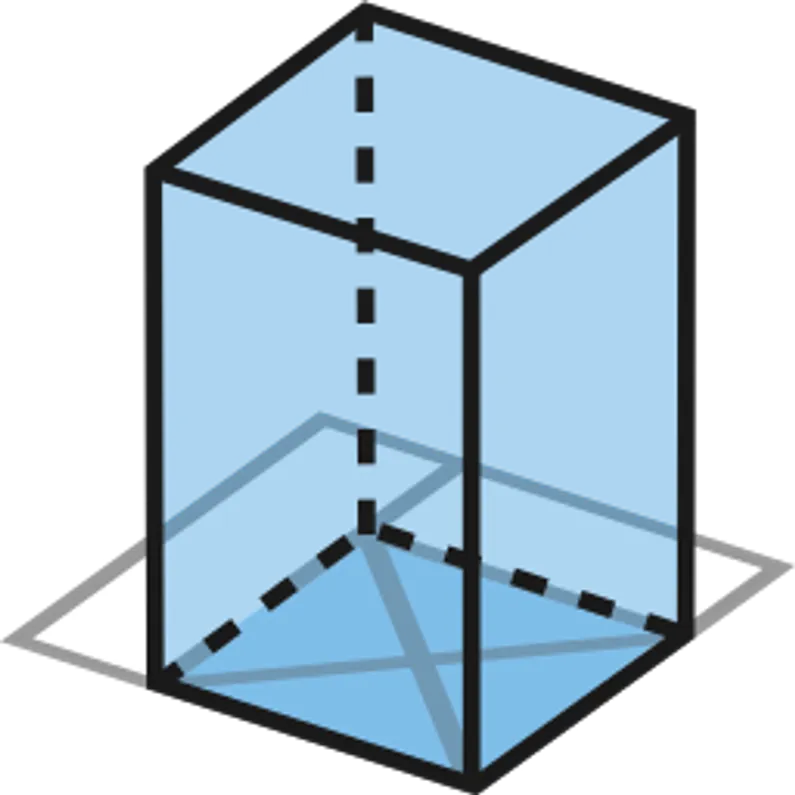
Room 3D Volumes generates 3D volumes for rooms, spaces and areas, so you can actually see the spaces in a 3D view.
Volumes are colored by room or space name through automatically created view filters. Rooms with the same name get the same color, so every electrical room, every data hall or every corridor stands out immediately.
Room data is written into shared parameters on the generated elements. You can see it in Properties and list it in schedules, without opening plans or adding annotations.
Volumes are also the fastest way to check room and space heights. Instead of cutting sections room by room, look at the volumes in 3D together with ceilings and roofs, and any room that stops short or pokes through is obvious immediately.
The real payoff comes in Navisworks and BIM 360 / ACC / Forma (or whatever they’re calling it this year). Once rooms are real 3D elements, they export with the model, and every coordination session has spatial context built in. You always know which room you’re in, or which room a clash is in.
Why would I use 3D areas?
Areas have no volume in Revit, but Room 3D Volumes can raise them into 3D, and that opens up some uses you won’t get from rooms alone:
- Rough gross volume calculations, straight from your area plans
- Quality checking areas in 3D, just like rooms and spaces
One of my favorite uses was detecting security elements outdoors. Cameras and card readers in the yard had no room to belong to. We had rooms for the generator enclosure yards, but the rest of the site was just “outside”. So I created a dedicated area type for the outside zones, raised volumes from those areas, and used a simple Dynamo script to fill in the data for every security element that fell inside one of those volumes.
How can room volumes help with MEP ceiling coordination?
This is one of my favorite uses. Generate room volumes in the mechanical or electrical model, and you can project the ceiling grid onto them.
That gives you a precise reference for aligning ceiling-mounted elements: air handlers, light fixtures and everything else that has to follow the ceiling layout. It’s a small trick, but it makes ceiling coordination much more accurate.
Do 3D room tags and volumes work with linked models and phases?
Yes. Both tools read rooms, spaces and areas from the current model and from all linked models, including multiple instances of the same link, organized by phase. You choose the phase and workset the new elements go into.
Design options are the exception. The Revit API doesn’t support placing elements into design options automatically, but you can move tags and volumes into a non-primary design option manually. That turns out to be the best way to control where they appear, as shown in the next section.
The default 3D tag family also includes a subcategory you can switch off when you need a cleaner view.
How do I show 3D room tags only in the Navisworks view?
3D room tags are model elements, so by default they show up everywhere, including floor plans, where they only get in the way. The trick is to put them in a non-primary design option and turn that option on only in the view you export to Navisworks.
- Create a design option set, for example 3D Room Tags, with two options: the primary one, for example Invisible, and a second one, for example Show 3D Room Tags
- Select all 3D room tag instances in the entire project, cut them, switch to the Show 3D Room Tags option and paste them aligned to the same place
- Duplicate a 3D view and name it Navisworks
- In that view’s Visibility/Graphics, on the Design Options tab, set the 3D Room Tags set to Show 3D Room Tags
- In Navisworks, go to Options > File Readers > Revit and make sure the Navisworks view is selected. Navisworks will then load exactly what that view shows, every time you refresh the model
Every other view stays on the primary option, so plans stay clean, and the tags appear only where you want them: in coordination.
Two things to keep in mind:
- Navisworks gets only what’s visible in that view. If the Navisworks view has a section box, the model in Navisworks looks like it’s cut with section planes, but it’s not just cut. Elements that weren’t visible in Revit are simply not exported. Turn the section box off before the final export if you need the whole model.
- Elements in a non-primary design option can’t be selected from other views. Switch into the option, or uncheck Exclude Options in the status bar. If a tag is in the way, move it somewhere more convenient.
Watch the full workflow on YouTube: Create & Control 3D Room Tags in Navisworks
How do I remove 3D room tags, volumes and their filters?
Each tool cleans up the elements it created:
- Delete all 3D tags or volumes at once, or only instances of a specific family type
- Delete the view filters, from the current view or from the whole project
- Delete the shared parameters
Deleting the shared parameters automatically deletes the filters too, because the filters can’t exist without them.
FAQ
What is the difference between rooms and spaces in Revit? Rooms are mostly used by architects and carry finish information. Spaces are used by mechanical and MEP engineers and have additional MEP parameters. Otherwise they behave the same.
Do areas in Revit have volume? Not natively. Areas are flat elements inside closed boundaries, with no 3D volume. Room 3D Volumes can raise volumes from areas for volume calculations, quality checks and zone detection.
Is Room Space Cleanup free? Yes. Room Space Cleanup is free as part of Via BIM Tools.
Can I use my own 3D tag family? Yes, as long as it has Name and Number instance text parameters.
Is there a free trial for Room 3D Tags and Room 3D Volumes? Yes. Both are part of Via BIM Tools, available at apps.viabim.co with a 30-day free trial.
Mirko Jurčević is the founder of Via BIM. He has worked in Revit since early 2013 and spent years leading BIM on hyperscale data center projects, where the tools in Via BIM Tools were first built and tested on projects with 40+ linked models.
